Terminus Build% No Gums Easter Egg Speedrun Guide
Loadout
Starting Loadout
Merrick
Frost Blast or Energy Mine
Decoy or Tomahawk
Weapon Builds
Merrick
Muzzle - Suppressor
Barrel - CHF Semi-Auto Conversion
Underbarrel - Crossbow
Magazine - Extended Mag II
Fire Mods - Rapid Fire
GS45
Muzzle - Suppressor
Magazine - Extended Mag II
Stock - Akimbo GS45
Fire Mods - Rapid Fire
The attachments you chose to use, other than what is listed, are based on you preference.
Augments
Stamin-up: Free Faller & Hot Foot
Juggernog: Probiotic & Hardened Plates
Speed Cola: Classic Formula & Quick Swap
PHD: PHD Slider & Tribologist
Dead Wire: Lightning Strike & High Voltage
Energy Mine: Turret and Siren
Aether Shroud: Extra Charge
Frost Blast: Ice Slick & Frostbite
All class setups are built under the assumption that the player has all augments and weapons maxed out.
Route
Round 1
Immediately run to Rampage and turn it on, then go to the Generator Room and activate that as well. End Round 1 by killing the zombies that spawn from the Rampage Room, the Generator Room, the outside area, and the event zombies (Event zombies are the zombies that spawn in before the round truly starts and for example kill the guards or attack the player if they wake up the zombie).
Round 2
By the start of Round 2, you should be outside by the entrance to the Generator Room. This positioning will cause your zombies to spawn only inside the Generator Room and outside. End Round 2 before the generator finishes turning on, and make sure to buy the GS45s off the wall.
Round 3 and 4
By the start of Round 3, you should be inside the Rampage Inducer Room. This positioning will cause your zombies to spawn only inside the Rampage Room and the Generator Room. End Rounds 3 and 4 while standing by the GS45 wallbuy near the window spawn, using your Merrick to clear the waves. Repeat this for Round 4 as well. At the end of Round 4, leave the Rampage Room and move to the Stamin-Up Room to play Round 5.
Round 5
Zombies:
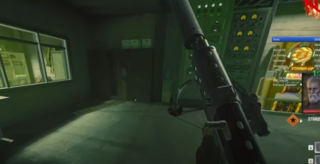
At the start of this round, buy Stamin-Up, interact with the Mr. Peeks stuffy located in the lockers to the left of Stamin-Up. Go back up the stairs and throw a decoy, finish Round 5 using your Merrick. If you have zombies on Round 5, you are guaranteed to get Round 12 bugs.
Bugs:
Same as with zombies, start by killing any scenario zombies in the Stamin-Up Room. Keep your decoy for the Round 6 zombies. Interact with the Mr. Peeks stuffy in the lockers near Stamin-Up, and buy Stamin-Up. Play this round on top of the computers in the middle of the room, you’ll be able to kill the bugs coming from both the window and the spawn door at the same time.
You will normally get eight bugs (seven if you killed one scenario zombie, or only three to four if you killed three scenario zombies). If you have Round 5 bugs, it becomes a 50/50 chance whether you get Round 10 or Round 12 bugs.
Round 6
Zombies:
Leaving the Stamin-Up Room, head down to Generator Two. Toss a tomahawk at the scenario zombie outside the Stamin-Up door to reach the generator faster.
Start Generator Two, check the trap, and then interact with the Unicorn stuffy on the bottom bunk of the bed to the right of the generator. Throw decoy into the middle of the room, pick up the free Shock Charge and then end Round 6. As soon as the round ends and there are fewer than three seconds left on the generator timer, move near the Engineering Room door and toss a tomahawk at a zombie with 1–2 seconds remaining. This will give you a speed boost as you run down to the PHD tunnel.
Bugs:
Leaving the Stamin-Up Room, head down to Generator Two. Toss a tomahawk at the event zombie just outside to reach the generator more quickly, and make sure to pick your tomahawk back up on the way down.
Start Generator Two, check the trap, and then interact with the Unicorn stuffy on the bottom bunk of the bed to the right of the generator. Pick up the free Shock Charge and then end Round 6. As soon as the round ends and there are fewer than three seconds left on the generator, move near the Engineering Room door and toss a tomahawk at a zombie with 1–2 seconds left on the generator timer. This will give you a speed boost as you run down to the PHD tunnel.
Round 7
Leaving generator two, you’ll go through the Engineering room, buy the door to the catwalk and right before the entrance to the Elemental Pop room, take a right and hop off the immediate ledge to your right onto the bridge right in front of you and go down to buy PHD tunnel. Tomahawk one of the zombies that spawn to your left while waiting on the door buy.
Go straight to the lab door, buy it, check PHD trap (assuming you don’t have Juggernog trap) and go straight to turn on generator three. After turning it on, use the crossbow from your Merrick to shoot the double points (Lineups, Resources). Use your field upgrade here and finish the round and jump off into the water with 3 or more seconds left on your generator to bring up your Pack-a-punch lift. Swap to frost blast if you started with Energy mine as the lift brings you up.
Round 8
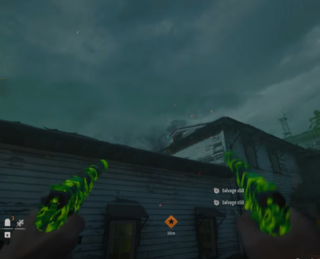
After bringing the lift up, Pack-a-Punch your GS45s. Activate the lift again to ride it upward, then immediately jump off the right side of the lift button after interacting so you can apply Deadwire to your GS45s at the Arsenal Machine by the PHD tunnel entrance. Once Deadwire is applied, jump back onto the lift and kill a few zombies as you move between the Arsenal Machine and the lift. While riding up, shoot the three shock boxes.
At the top, mantle toward the Quick Revive side (to the right of Pack-a-Punch), go up the stairs, and interact with the computer. Enter the code into your solver (Terminus Code Solver, Resources), then mantle off the side and tomahawk a zombie if you have the Stamin-Up perk. Move across the lift to the Stamin-Up side and interact with the computer there as well. Place that code in your solver, mantle off the side again, and head straight to the boxes between the Engineering Room and Generator Two doors. Climb onto the box and shoot the basketball easter egg with your GS45 to earn the free 4000 points.
Next, shoot the shock box in this room and then the one to the left through the wall into the Generator Two room. Head into the secret room and pick up the keycard from Anya. After grabbing it, run down to the PHD tunnel and buy PHD. While heading there, this is a good time to input the two previously collected codes into the solver if you haven’t already, preventing wasted time at the computers.
After buying PHD, interact with the last computer and take the zipline in front of you up to the Elemental Pop room, where you’ll enter your final code. At the top of the zipline, interact with the briefcase to collect the injector. Tomahawk the zombie spawn on the floor to the right of the briefcase (if you have Stamin-Up), then move through the Engineering Room to the computer in the secret room. Insert the injector and enter your code. Once the code is correctly accepted, end Round 8, collect the drops, and grab the 4000 points from the basketball easter egg.
Round 9
After round transition, pick up the injector from the computer. Buy Juggernog and go to the Engineering room to buy a C4 from the crafting table and check the # of days poster for your first code. (It will be the 3rd number needed for the Nathan code in the lab later). Go down to the boat at the dock by mantling off of the side into the water, or sliding off of the railing to the boat if you have the Stamin-up perk.
Blue Orb
-
Take the boat to Blue orb island. Passing by the tower, you will be able to see if you have the wire already placed at the tower or not. As you get there, slow down and jump off of the boat, place the injector in the orb. Get back on the boat and reposition it facing the Green orb island. Get off of the boat and back onto the island (the boat needs to be repositioned in no more than 3 seconds, otherwise, round zombies will spawn instead of orb zombies which will lose you time and potentially mess up the orb).
-
Wait for the orb to shock one zombie, after the shock, kill everything on the island while taking the dropped orb to the blue orb. After placing you will kill two zombies and two vermin that spawn in prior to killing everything. After doing this, the orb will shock. You’ll kill the zombie and place the orb. Pick up the injector and head to Green orb island on the boat.
Green Orb
-
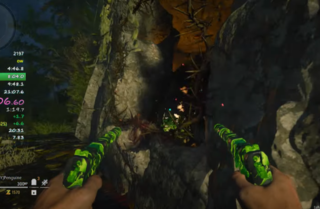
When getting to green island, position your boat facing Purple orb island as you get off of the boat onto the island and then place the injector in green orb.
-
Head to the left side of the island towards the free nuke power up, shoot the free nuke but don't pick it up until you hear the zombie get shocked. Walk into it right after the shock, pick up the orb and place it. Don’t kill anything and the orb will shock another zombie. Kill that zombie and place the orb. Pick up the injector.
-
Get onto the boat and head to Purple orb island, driving closer to the main island as it's quicker then going all the way around the rocks.
Purple Orb
-
Once you arrive at Purple orb island, slow down and position your boat facing the tower. Jump off of the boat and place your injector in the purple orb, throw your C4 and wait for the shock (Lineups).
-
Kill the shocked zombie and kill every zombie currently spawned in (doesn’t need to be exact) along with two vermin while you’re walking the orb back/after placing the orb.
-
Your next zombie will be shocked after that. Kill him and place the orb. Pick up the amp and get on the boat. Go to the tower.
Once you reach the tower, take the zipline up to the Elemental Pop room and then go through the Engineering Room (check the “# of Days” poster if needed) to reach the secret room. Build the Beamsmasher there, and make sure everything is set before moving on.
If you have the Juggernog Trap, activate it on your way to build the Beamsmasher. After the Beamsmasher is built, pick up the hard drive from the trap, then finish the round by the trap. If you do not have the Juggernog Trap, simply end Round 9 after building the Beamsmasher.
Round 10
Jug Trap - after picking up the hard drive from the trap and ending round 9, go through the Quick Revive side to spawn and place the hard drive in the guard shack
PHD Trap - after ending round 9, go through the days room to the phd tunnel, get the hard drive from the trap. Take a right to the elevator and go up and place the hard drive in the guard shack
Speed Cola Trap - after ending round 9, jump off of the lift and swim to the left side of the lab to Speed Cola tunnel. Buy the door and get the hard drive from the trap. Go through the middle of the lab to the elevator and go up and place the hard drive in the guard shack.
Heading out of the Quick Revive room, check the clock on the barrier to the right of the door and note the hour hand. This will be the first number needed for the Nathan code in the lab. Go through the Quick Revive door, jump off the ledge, and interact with the lift. As soon as you interact, run to the Mess Hall. Check the card and note the number on the card, which will be the second number needed for the Nathan code. Then go back to the lift and jump off the side onto it.
Once you are halfway down, jump off the side and go to Nathan in the center of the lab. Interact with the hatch and a quote will play. Thin the round down to one zombie. If you have round 10 bugs you cannot quote skip because round 12 bugs are needed. In that case you will end round 10 bugs before starting Nathan.
For the slow quote skip, do not end the round. Put in the code when allowed after the quotes play. The code combination is clock, card, and the number from the Days poster. After inputting the code, interact with the switch to the right of the code pad or any switch. You will remain on round 10. For the fast quote skip, put in the same code, interact with a switch, and then end round 10 immediately.
After flipping the switch, get armor if needed and go back to Nathan. Place your C4. As Nathan steps out, grab the free Instakill from the C4 and use Frost Blast near the bridge. Use the Beamsmasher to kill him. Nathan should fall over after stepping out because of the Frost Blast and he will not be able to grab you. Refer to Wire Routes for the route after this section.
Quote Skips Explained
Note: These only work if you have round 12 bugs and not 10 bugs.
“Slow” Quote Skip
-
This quote skip will allow you to play any combination of wires (island/tower, island/speed, and tower/speed). It’s about 15 to 20 seconds slower than “fast” quote skip.
-
For “slow” quote skip, you will be ending round 10 zombies where you placed your last wire (either under tower or Speed Cola tunnel).
-
After ending round 10 zombies for tower wire last (island/tower combination), you will stay under the tower by the wire and shoot the full power from under the tower (Lineups, Resources) at the start of the round. End round 11. Take the zipline up, through the Engineering room all the way to the guard shack and your second set of quotes will play (these are unskippable). After the quotes start, turn off the rampage inducer and shoot the free max ammo if needed.
-
After ending round 10 zombies for Speed Cola wire last (island/speed and tower/speed combinations), you will go to the lab and take the elevator to spawn. You will end round 11 in spawn right next to the elevator as it has the fastest spawns. Go to the guard shack and your second set of quotes will play (these are unskippable). After the quotes start, turn off the rampage inducer and shoot the free max ammo if needed.
Note: On round 11 transition, the exfil announcer will quote and you will then flip to round 12 and get the bug round announcer quote. Both quotes played will cause the first set of quotes to quit playing.
“Fast” Quote Skip
-
This quote skip will allow you to only play island/tower, and island/speed wire combinations.
-
For “fast” quote skip, you will already be on round 11 starting Nathan. Once you skip the cutscene after Nathan, the exfil announcer quote will play. From the initial black screen after killing Nathan, you have 2 minutes and 12 seconds to place both of your wires. You will end round 11 where you place your last wire (either under the tower or speed cola tunnel) as soon as the 2 minutes and 12 seconds pass (the exfil announcer quote for the expiration of exfil will play after 2 minutes and 12 seconds).
-
Example: After killing Nathan, your timer as soon as you see the black screen for the first time says 11:00. That means at 13:12, the exfil announcer will quote and you will end your round immediately (you should have one zombie before the quote plays).
-
For tower wire last, thin down one zombie and shoot the full power from under the tower. You will end round 11 2 minutes and 12 seconds after killing Nathan and seeing the black screen or when the exfil announcer quotes that he is leaving after placing your last wire. After round transitions to 12, take the zipline up immediately and go straight to the guard shack in spawn. Once you get there your second set of quotes will play (these are unskippable). After the quotes start, turn off the rampage inducer and shoot the free max ammo if needed and pick up the hacker device.
-
For speed wire last you will end round 11 immediately after the exfil announcer quotes. Go through the lab to the elevator and go up to spawn to the guard shack. After the quotes start, turn off the rampage inducer and shoot the free max ammo if needed and pick up the hacker device.
-
The quote skip works as such, once the exfil announcer plays after Nathan cutscene there will be about 2 minutes and 10 seconds until the exfil announcer plays that he is leaving. You will then flip to round 12 and get the bug round announcer quote, both quotes played will cause the hacker quotes to quit playing.
Wire Routes
This section will cover the route after Nathan, depending on the wires you have and quote skip you’re playing for. Go to “Quote Skips Explained” for an explanation on the difference of the quote skips and how to play them correctly.
Slow Quote Skip (Island/Tower AKA Perfect Wires)

-
After killing Nathan, turn directly around and take a right past Melee Macchiato, buy a boat and drive it straight (8). Slow down and jump off of the boat once you get above the key card, get the key card, swim back up and take the boat through the tunnel in front of you, this should take you straight to the boat.
-
Position your boat facing the way you were already going, get out and climb the ladder, pick up the wire inside the boat, swap to aether shroud and wait three seconds after you pick up the wire to throw the shock charge at the hatch to do the lockdown skip, you can do the skip 3 seconds after pick up or after but not any earlier.
-
Get back on the boat , drive forward and take a left to green island. Place your wire and get back on the boat, going back the way you came you'll position your boat facing main land and get on the ladder, grab your next wire and head to your next wire.
-
This route assumes you have to place tower wire still, so leaving under the boat you’ll take a right to the tower. Slow down and hop off the boat directly to the right of the tower wire, position your boat to where it is still in the water, do not beach the boat, place your wire.
-
End round 10 (zombies), shoot the full power from under the tower at the start of the round, end round 11 and take the zipline up. Go through the Engineering room and go straight to the guard shack in spawn. Your second set of quotes will play (these are unskippable), after the quotes start, turn off the rampage inducer and shoot the free max ammo if needed.
Slow Quote Skip (Island/Speed AKA Decent Wires)
-
After killing Nathan, turn directly around and take a right past Melee Macchiato, buy a boat and drive it straight. Slow down and jump off of the boat once you get above the key card, get the key card, swim back up and take the boat through the tunnel in front of you, this should take you straight to the boat.
-
Position your boat facing the way you were already going, get out and climb the ladder, pick up the wire inside the boat, swap to aether shroud and wait three seconds after you pick up the wire to throw the shock charge at the hatch to do the lockdown skip, you can do the skip 3 seconds after pick up or after but not any earlier.
-
Get back on the boat , drive forward and take a left to green island, place your wire and get back on the boat. Go back the way you came, you'll position your boat facing main land and get on the ladder, grab your next wire and head to your next wire.
-
This route assumes you have to place your wire at speed cola still, so leaving under the boat you will head straight into the tunnel to the lab, take a left and hop over the railing, go to speed cola door, buy the door and place speed cola wire, end round 10.
-
At the start of round 11, you will go to the lab and take the elevator to spawn and end round 11 in spawn by the elevator. Go to the guard shack and your second set of quotes will play (these are unskippable). After the quotes start, turn off the rampage inducer and shoot the free max ammo if needed.
Slow Quote Skip (Tower/Speed AKA Worst Wires)
-
After killing Nathan, turn directly around and take a right past Melee macchiato, buy a boat and drive it straight. Slow down and jump off of the boat once you get above the key card, get the key card, swim back up and take the boat through the tunnel in front of you, this should take you straight to the boat.
-
Position your boat facing the way you were already going, get out and climb the ladder, pick up the wire inside the boat, swap to aether shroud and wait three seconds after you pick up the wire to throw the shock charge at the hatch to do the lockdown skip, you can do the skip 3 seconds after pick up or after but not any earlier.
-
Get back on the boat , drive forward and take a left to green island, for this route we will assume you don’t have island, but you will always check it. You will be able to see if you have island wire by zombies spawning in before you get onto the island. Take a left from the island and go straight to tower, slow down, position your boat to where you can get right back on it and leave, jump off and place your wire, get back on the boat and go back and get your wire.
-
Head straight into the tunnel to the lab, take a left and hop over the railing, go to speed cola door, buy the door and place speed cola wire, end round 10.
-
At the start of round 11 you will go through speed tunnel to the lab and take the elevator to spawn, and end round 11 in spawn, go to the guard shack and your second set of quotes will play (these are unskippable), after the quotes start, turn off the rampage inducer and shoot the free max ammo if needed.
Fast Quote Skip (Island/Tower AKA Perfect Wires)
-
After killing Nathan, turn directly around and take a right past melee macchiato, buy a boat and drive it straight, slow down and jump off of the boat once you get above the key card, get the key card, swim back up and take the boat through the tunnel in front of you, this should take you straight to the boat.
-
Position your boat facing the way you were already going, get out and climb the ladder, pick up the wire inside the boat, swap to aether shroud and wait three seconds after you pick up the wire to throw the shock charge at the hatch to do the lockdown skip, you can do the skip 3 seconds after pick up or after but not any earlier.
-
Get back on the boat , drive forward and take a left to green island, place your wire and get back on the boat, going back the way you came you'll position your boat facing main land and get on the ladder, grab your next wire and head to your next wire.
-
This route assumes you have to place tower wire still, so leaving under the boat you’ll take a right to the tower. Slow down and hop off the boat directly to the right of the tower wire, position your boat to where it is still in the water, do not beach the boat, place your wire.
-
Thin down to one zombie, shoot the full power from under the tower, at 2 minutes and 11 seconds after Nathan cutscene round 11 and take the zipline up, taking days room go straight to the guard shack in spawn and your second set of quotes will play (these are unskippable), after the quotes start, turn off the rampage inducer and shoot the free max ammo if needed.
Fast Quote Skip (Island/Speed AKA Decent Wires)
-
After killing Nathan, turn directly around and take a right past melee macchiato, buy a boat and drive it straight. Slow down and jump off of the boat once you get above the key card, get the key card, swim back up and take the boat through the tunnel in front of you, this should take you straight to the boat.
-
Position your boat facing the way you were already going, get out and climb the ladder, pick up the wire inside the boat, swap to aether shroud and wait three seconds after you pick up the wire to throw the shock charge at the hatch to do the lockdown skip, you can do the skip 3 seconds after pick up or after but not any earlier.
-
Get back on the boat , drive forward and take a left to green island, place your wire and get back on the boat. Go back the way you came, you'll position your boat facing main land and get on the ladder, grab your next wire and head to your next wire.
-
This route assumes you have to place your wire at speed cola still, so leaving under the boat you will head straight into the tunnel to the lab, take a left and hop over the railing. Go to speed cola door and, buy the door and place speed cola wire, you have to be fast otherwise you won’t be able to end round place wires in time before the exfil leaving quote plays. After placing wait for the exfil leave quote and end round 11, go through lab and take the elevator to spawn, go to the guard shack and your second set of quotes will play (these are unskippable), after the quotes start, turn off the rampage inducer and shoot the free max ammo if needed.
Round 12/13
Everything in this section begins after the quote skip at the guard shack in spawn. If you did not quote skip and had round 10 bugs, you should have enough money to buy Quick Revive before picking up the hacker. You will need around 12,500 points because you will buy Speed Cola later in the run.
Pick up the hacker and head to the tower where you left your boat. If you had Speed Cola last, you will need to take the zipline down and buy a new boat. If you were not able to shoot the full power from under the tower, you can shoot it now from the outside railing to the left of Elemental Pop. After that, jump off the side onto your boat if it is still there, take the boat to the buoy straight across from the tower, and hack it.
When it is done, drive to the right of that buoy, passing Green Island. There will be another buoy between Green Island and the boat. Hack this buoy. After that, drive past the island on the right, moving closer to the main island because it is quicker, and hack the buoy that is past Purple Island.
After hacking the last buoy, continue straight in the same direction and enter the lab through the closest entrance on that path. Once you are inside the lab, craft a decoy and armor if you need them. Start with the bottom-left bomb directly under the crafting table. As the door opens the bomb will be about halfway up when you use Shroud. Disable this bomb and run straight across to the second bomb at the bottom. Turn around, toss your decoy, and armor up if needed, then disable the second bomb. For the last bomb, run up the stairs to your right, armor if needed, and disable the top bomb. You will not need a decoy or Shroud for this one.
When the last bomb is finished, craft armor and a decoy if you can. These will not be required but can still be useful. Go down to the boss entrance door, interact with it when it opens, then go to the Speed Cola tunnel and buy Speed Cola for the boss fight.
Boss

Phase 1
-
During phase one of the boss fight there will be two attacks, the slam attack and wipe attack.
-
You can tank wipe attacks in this phase but the damage dealt is inconsistent.
-
For wipe attacks if you stand back towards the back of the ammo box the hitbox can’t hit you.
-
The goal for this phase is to hit the ammo box to avoid reloading, reloading loses time, moving around back and forth avoiding zombies while constantly shooting the boss, and avoiding the projectiles from the tentacles along with the slams from the boss without losing time.
-
In between 1st and 2nd phase the goal is to just build up as much aether shroud charge as possible.

Phase 2
-
1:08 after the boss becomes immune in the 1st phase the boss will spawn in the 2nd phase.
-
Shroud 1:06-1:08 after the boss becomes immune in the 1st phase for the start of the 2nd phase.
-
The goal for the start of 2nd (fire phase) is to end the phase without reloading, you’ll shoot the boss until you will need to reload, pick up the max and keep shooting the boss.
-
The way to end the fire phase is to do x amount of damage to the weak spot.
-
Note: in fire phase you can NOT tank a slam, most of the time you will get one shot or downed, the hitbox for wipes still can’t hit you as long as you’re in the back of the arena by the ammo box.
-
After the fire phase there will be about a 3 second stun, buy ammo here.
-
The next phase is like the first phase, and you’ll play it as such but with more zombies, the only attacks here are still slam and wipe.
-
In between 2nd and 3rd phase continue to build aether shroud charge and use your beam smasher against the amalgams.
Phase 3
-
1:08 after the boss becomes immune in the 2st phase the boss will spawn in the 3nd phase.
-
Shroud 1:06-1:08 after the boss becomes immune in the 2st phase for the start of the 3nd phase.
-
In the 3rd phase there are four attacks and three phases, the attacks are slam wipe nuke and tongue, while the phases are deadwire (essentially first phase) fire and blue.
-
Play the start normally with shroud and try to get in as much damage as possible
-
After shroud you will play according to the phases you get and try to end the slow ones as quickly as possible (fire and blue).
-
For blue phase the attacks that can be done are slam, wipe and nukes. To end the blue phase entirely you will need to break all of the eyes, to end the nuke phase you will just need to do a certain amount of damage to the eyes.
-
For the fire phase it is the same as the 2nd phase, you can NOT tank a slam and you can avoid the wipes the same way.
-
Tongue or Deadwire phases are the best as you can get in normal damage no matter where you shoot and when the boss gets stunned in those phases you don’t lose 3 seconds.
-
When your boss's health bar disappears you will end your timer 37 seconds later or after SAM disappears from the side of your screen.
Supplmental Information
Timings
-
Generators last 30 seconds from being turned on
-
PHD trap loses about 25 seconds compared to jug trap
-
Speed cola trap loses about 40 seconds compared to jug trap
-
Exfil leave quote plays 2 minutes and 5 seconds to 2 minutes and 10 seconds after nathan kill
-
The start of 2nd phase and 3rd phase is 1:08 from when the boss becomes immune at the end of the previous phase
-
In 2nd phase of boss, in the fire phase, slam first loses 3-5 seconds
-
In 3rd phase of boss, blue loses about 5 seconds, the stun at the end of blue after you break the eyes is 3 seconds, a fire phase also loses about 5 seconds
-
You’ll end your timer 37 seconds after the boss’s health bar disappears at the end of 3rd phase, which is immediately after SAM disappears from your screen
Lineups
Double Points with Crossbow

Insta-Kill with C4

Full Power with GS45


Additional Resources
Current World Record
Terminus Code Solver
Outdated Guide
Any extra tips not given in the guideHow to Speedrun Terminus Like a Professional
Submit Edit
Do you have a ZWR profile?
Contributors
Original Contributor(s)
Other Contributors